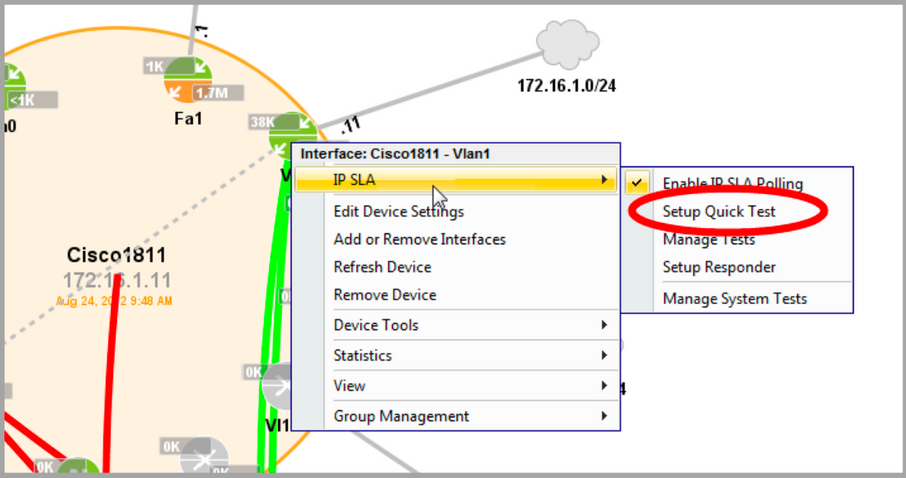
Setup Quick Test Wizard
Network verification and testing can be set up quickly using the LiveNX IP SLA Setup Quick Test wizard. The quick test can be invoked by clicking the Quick Test or right clicking on the particular interface you want to generate the IPSLA test stream from.
The following example goes through setting up a test to measure jitter, latency, and loss between two routers.
1. In the IP SLA tab toolbar, click Setup Quick Test to display the Setup Quick Test dialog box. If the Log In Required window appears, you must log in with Admin or Full Config credentials.

2. Select the source router or switch from the Device drop-down list of available devices.
The Entry ID number is filled in automatically. This is a unique number that identifies the test in the Cisco router.
3. Select Test type. Options are DHCP, DNS, ICMP Echo, FTP, HTTP, Jitter, Video, UDP Echo, Path Jitter, and Path Echo.
“Echo” refers to the receiving router sending back the data unchanged to the sending router, and “jitter” indicates variations in delay times between multiple UDP Echo packets. “Path” refers to the display of the path the test traffic will take through the network.
Path Echo and Path Jitter tests measure the time between sending and receiving acknowledgment of user Datagram Protocol (UDP) Echo (port 7) packets. This is useful in determining round-trip delay for programs using UDP to communicate over the network.
Video is a new test function also known as Medianet IPSLA Video Operation. This test type is capable of generating synthetic Telepresence, IPTV and IP video surveillance traffic.
4. Enter the optional Tag value to use as the name, label, or description of the test.
5. Select the Source address from the dropdown list of interfaces. All existing interfaces for the device should be listed.
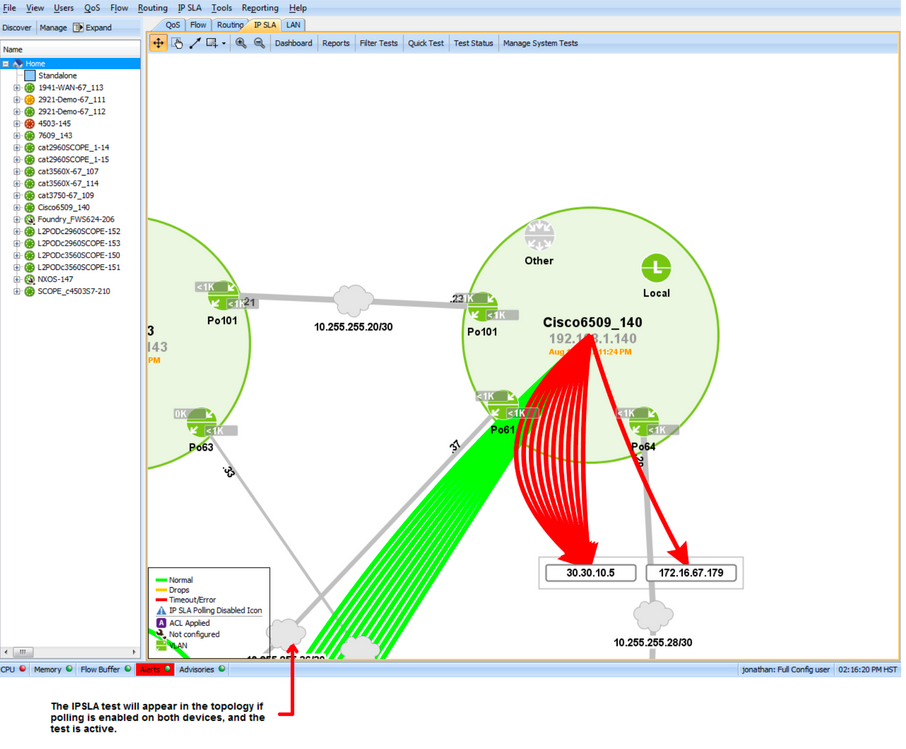
6. Select the Destination address (IP address or hostname) by clicking on the desired destination device interface in the IP SLA topology view.
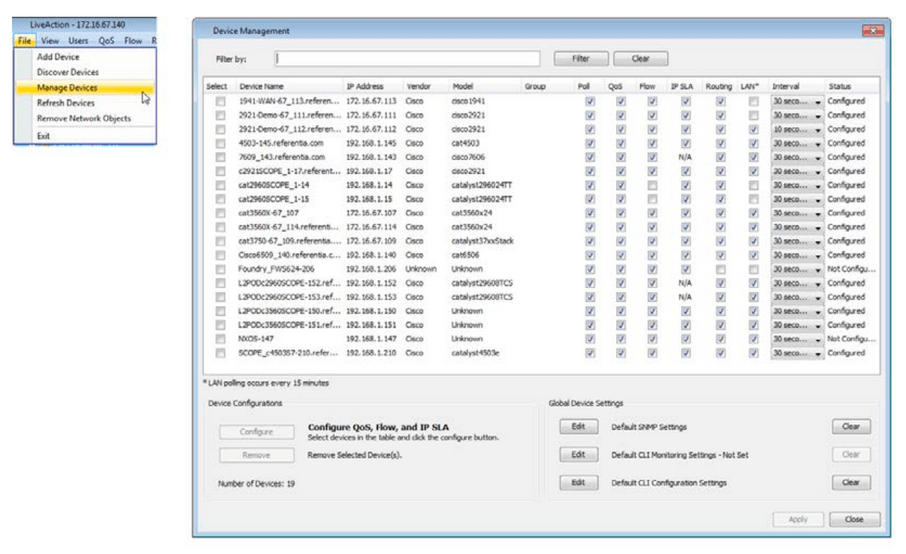
7. Enable IP SLA polling for both devices by going to File > Mange Devices. Select the appropriate check boxes in the Poll and IPSLA column. Polling must be enabled before IP SLA test results will appear.
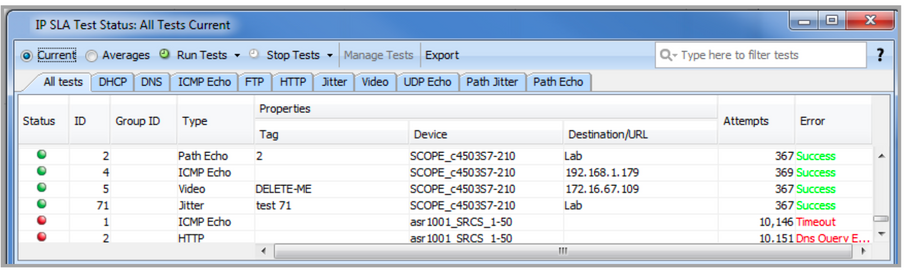
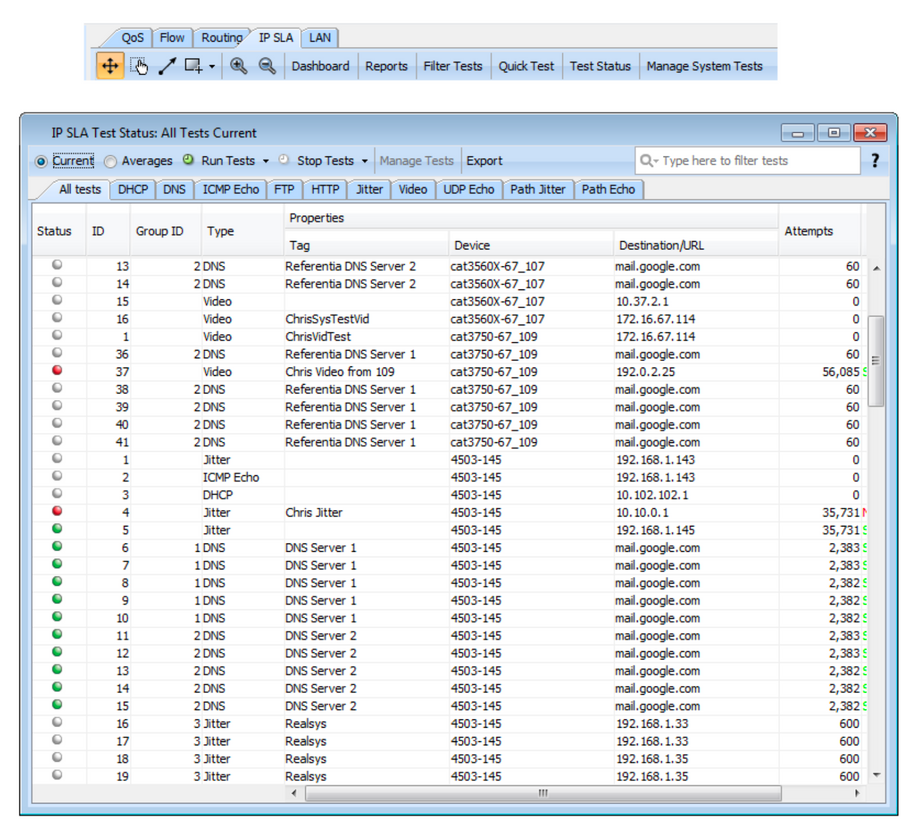
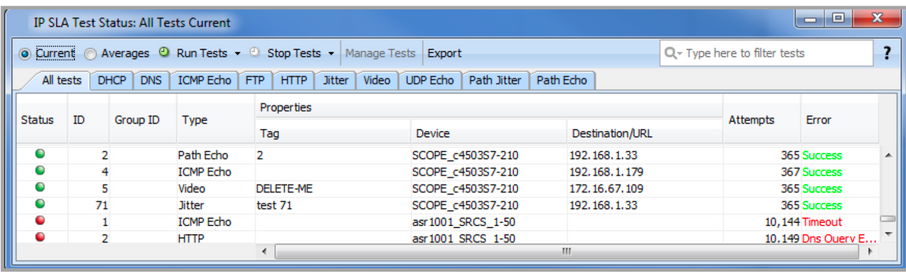
8. To monitor this test, click Show Test Status in the IP SLA tab toolbar. This will bring up the Test Status window that will show you statistics for latency, jitter, and loss.
• The test will run continuously by default until ended.
• Statistics will take one polling interval (default is 60 seconds) to refresh.
Additional detailed test information can be accessed by clicking on the originating router while in the IP SLA view. This displays a set of graph for Latency, Jitter, Packet Loss and MOS scores as shown below.
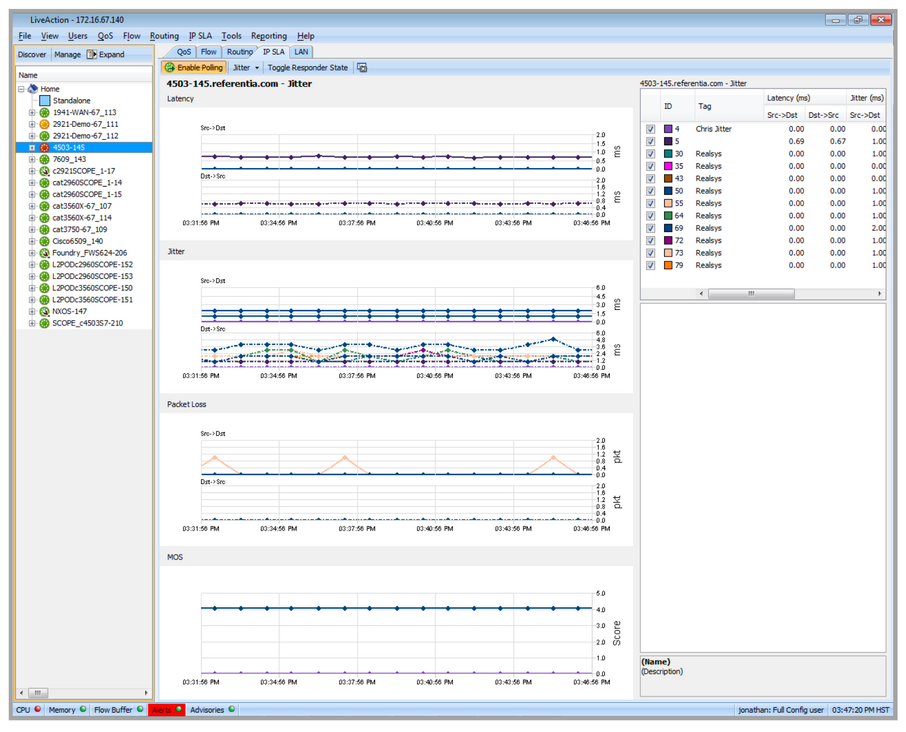
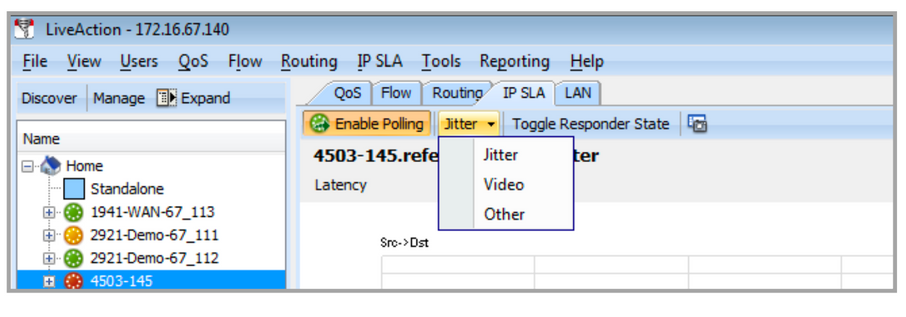
9. By selecting the viewing mode, various different sets of graphs can be shown that are appropriate for the test being run.
10. The IP address in the Destination/URL field can be changed to a user-defined value by the Edit IP Mapping feature.
11. By selecting Tools > Edit IP Mappings described in IP Mapping, select Add and then type in a user-defined Name and the desired IP Address. The new user-defined value is displayed in the Destination/URL field.